Thursday, 14 May 2009

BBC Ident 3

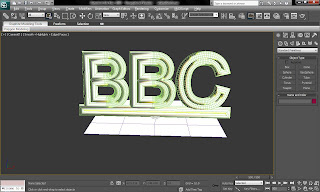
My third advertisement its an opposite copy of the second. That means that the robot is falling down from the sky and hits on the box and configures a BBC word.


I think it is a simple animation although it is impressive when someone watches it. Also in this advertisement  there are not any special effects or materials. 

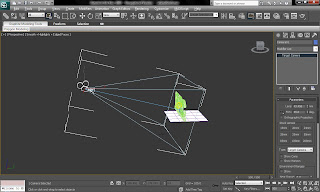
At this stage I have also placed one free light and one target camera to be more realistic.


BBC Ident 2

My second advertisement has not any special materials or settings in it. It is really easy to construct and it is impresive.


 In this animation I made the robot moving forwards and backwards and I made the word "BBC" falling from the sky on top of the robot and squashing it.

 I also made one free light with the same setting
 as on the first animation but I placed it higher to make the light smoother. 


I also created one target camera to record the scene around.


BBC Ident 1

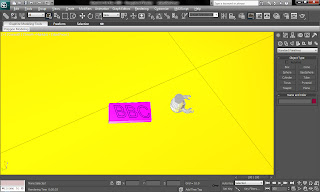
The scenario of the first animation is that the main character, the robot, destroys a box with laser rays and at the end the box catches fire.


To create this animation I drew a plane and used it as a ground and I put the box and the robot on it. For the text I used, Create>Shapes>Splines>Text 

and from the material settings I made it visible to the render. I also created  the laser rays, I drew a cylinder and after I played with the material editor to add on it glows and make it shiny. Following I tried to make it on fire using Create>Helpers>Atmospheric Apparatus>Sphere Gizmo 
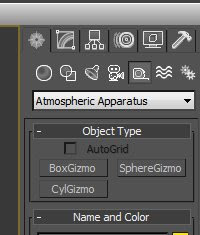
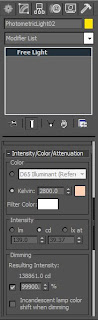
and changing the setting from Material Editor I made it look like a fire. I also added one free light and changed the colour and the intensity I had the desirable result. To complete the scene I added one Target Camera recording the moves of my objects.



Main Character of my Movie Clips

This is my assignment for my university module 3D modelling and Animation. The theme of this assignment was to create 3 advertisements for a TV channel by using the software 3D Studio Max. I used the 2010 version of that software and I will explain bellow the way I worked to achieve my target.


Firstly I created one object to make it the main character of my advertisements. My object is a robot which is appearing in every movie clip. I created it by following tutorials online and book material. I started by drawing a square. After by using the Chamfer Edges tool I made it look like a half pyramid for the base of the character. And then I converted to editable poly and I played with the Bevel Settings and I started manipulating the base to make it as I intended to. Then I drew some tracks to put around the base, I also drew two cylinders and I attached them together to make them look like legs. On top of the legs I drew a capsule for the main body of my character, also with the Bevel Settings I manipulated it to make it look like head and body together. For the hands I drew two cylinders and I bent them in and at the end of each one added four claws as fingers. To make a proper robot you have to add one antenna. so I used the top of the body as antenna and after I added one ring around the antenna and one short cylinder at the top of the antenna. The result is the image below.

Thursday, 11 December 2008

September

These images below created for my university assignment of module 3D Modelling and Animation. The first semester's assignment it is about the month September and has as theme the landscapes created by the season close to mountains, the second image is for August and the very good weather for swimming and sunbath on the beach. The third and last image is for April and the tornados at Sahara desert. The images below created on 3DS MAX STUDIO 9 of Autodesk.


On this image you can see mountains at the back, they are pyramids and I convert them to editable poly and after I fit on them one bitmap image from with the assistance of the material editor tool of the program. I copy the first pyramid and I put the clone next to it as to make a line of mountains to look more realistic.

The ground is a box and I coloured brown as the ground.

The trees are from the objects of the software and I cloned them to make a little forest.

The river is a plain converted to an editable poly and the colours are from a bitmap image and with the material editor tool fit it on the object.

August

The image below created for my university assignment of module 3D Modelling and Animation as well, for first semester's assignment and is about the month August and has as theme the beaches at the exotic resorts. I create also this image on 3DS MAX STUDIO 9.


On this image first I design a plain and I add on it with the help of the material editor and one 24-bitmap image the plain to sand for the beach.

Secondly I made anther plain for sea and with the same way, material editor, I made it look like a sea, I found from Google images an image I liked it and I converted on bitmap on Adobe Photoshop and I fit it on the object I liked.

The same way was and the sky at the background.

I made one more plain for the towel on the sand I converted to a editable poly and I made it look more realistic as someone laid on it and he left.

The ball it is just a sphere with colours on it, the colours are one bitmap image created on Adobe Photoshop by me.

Also on this image we can see and an umbrella, I create this object with to spheres and I used the proboolean tool to separate the half of the sphere and to make look like an umbrella after I add one stick at the bottom of the half sphere to make it a beach umbrella, also I put colours on this object as the material editor and a bitmap image with bamboos sticks on it.

April


On this image I create a plain for the sand and I convert it to editable poly and I made some hills on the sand also I use and the material editor to fit on the plain the bitmap image I designed on Adobe Photoshop.

I designed as well and one more plain for the sky, on this image also I fit on it a bitmap image I designed on Adobe Photoshop.

Also I designed a cone for a tornado, on this object also I converted to editable poly and I squeeze it at the middle of its high, and using the material editor I put another bitmap image git on it.